2019 February: Half-day trip to climb
Mt Claude
Mt Claude Lookout
in Tasmania, Australia
Mt Claude
Mount Claude summit and its infamous chockstone (the 2 red arrows):

How many mountain peaks do you know where you reach the summit by walking across a chockstone ?
And how many mountain peaks do you know where you reach the summit by climbing up a near-vertical tunnel inside a dark cave ?
Mt Claude is unique ! You can reach its summit by both ways !
Walking across the chockstone, though exciting, can be scary. Alternatively you can climb up the tunnel instead, which is equally exciting.
Prolog
Two years ago, in 2017 January, I traversed Mt Roland plateau ... climbed Mt Roland and Mt Vandyke; but couldn't complete the trifecta by climbing Mt Claude :-(
( Photographs and a report of that trip are in my blog:
http://mntviews.blogspot.com.au/2017/01/mt-roland-mt-vandyke-mt-claude-lookout.html )
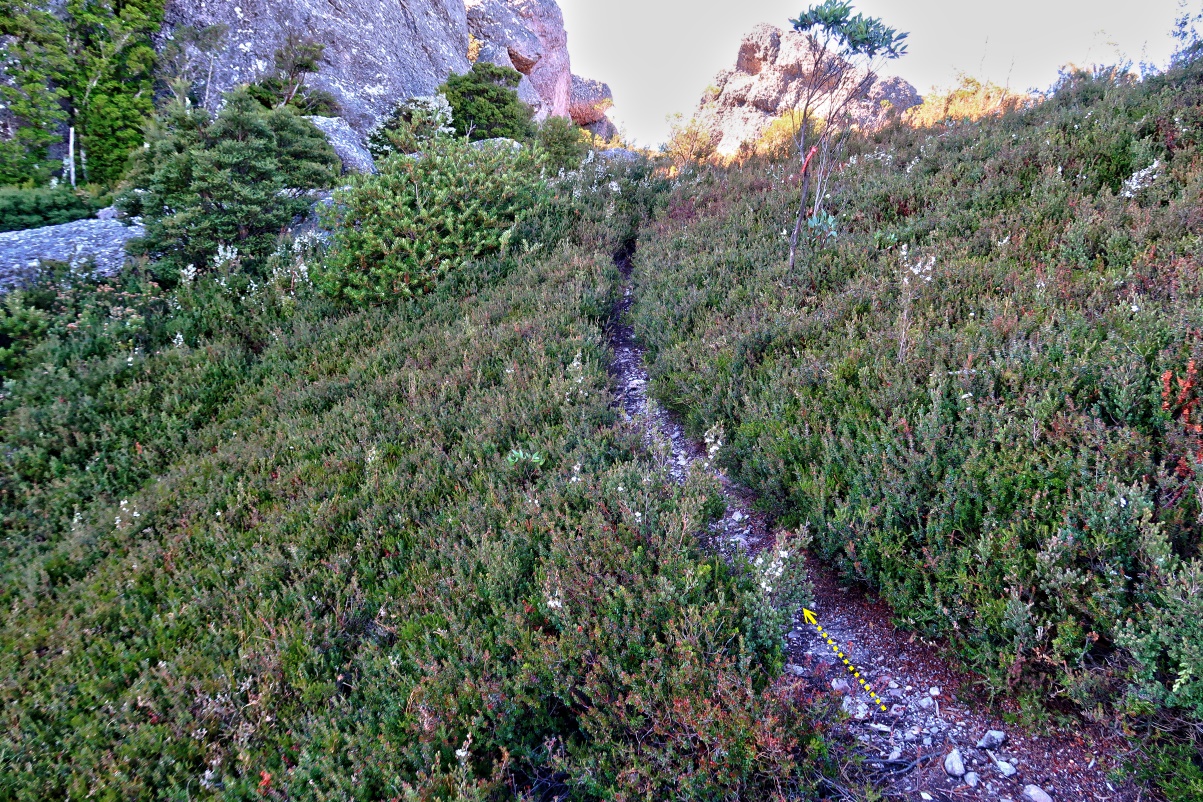
From the main foot track, it wasn't obvious how to climb up Mt Claude's rock face. As it was getting late in the afternoon, I wasn't willing to spend time to explore the back of the mountain to find a way up. All this came about because I hadn't done a research on how to climb this mountain.
So, today, armed with information gleaned from websites, I am back here again to finish the unfinished business ... climb Mt Claude, successfully this time !
How to climb Mt Claude
There are instructions in various websites on how to climb Mt Claude. I found they are all too wordy and not easy to digest, especially so when not illustrated by photographs.
Not to worry, the route-finding is quite easy. Here is my experience:
At where you leave the gassy / low scrub area, and start the scramble up the rocky slope of Mt Claude (ie after photo #17), keep the following principles in mind:
- Climb more or less straight up, don't veer too much to the left, nor too much to the right.
- If the route ahead seems easy, take it. Conversely, if the route ahead seems hard, don't take it.
- If the ground seems to have been compacted, it means people have walked on it, then so should you.
- If by chance you are climbing Mt Claude in the morning of February 22, simply head in the general direction of the sun.
There you are, simple !
Some websites also suggest there are cairns you can follow. Forget it; I didn't find any until I'm in the cavern in photo #36. By that time you don't need any cairn to guide you.
Map
2 blue arrows from left to right:
1 Telecommunications facility
2 Mt Claude Lookout

GPS tracklog file & route
The GPX tracklog file of my walk can be downloaded from:
- Forward leg, from Round Mountain Lookout to Mt Claude summit:
Not available ... GPS recording was not accurate :-(
It would be the reverse of the following GPX file, minus the side trip to Mt Claude Lookout.
- Return leg, from Mt Claude summit back to Round Mountain lookout:
https://drive.google.com/open?id=1OBEKaOpeCrAtfRif9jUn8Pia2KLTXPuE
The GPS tracklog of my return leg is drawn in red in this contour map:
3 blue arrows from left to right:
1 Workman's shed at a telecommunications facility
2 Towers at a telecommunications facility
3 Mt Claude Lookout

Zooming into right part of previous pic:
3 blue arrows from left to right:
1 Mt Claude Lookout
2 Where grassy / low scrub area ends, and the start of the rocky slope of Mt Claude
3 Mt Claude summit

Satellite image ... My return leg is in brown:

Zooming into right part of previous pic:

In summary, the route for today's trip is:
- Park car at Round Mountain Lookout on the west side of Olivers Road.
- To Mt Claude summit ... via tunnel
- Retrace steps to climb down Mt Claude.
- Detour to the top of Mt Claude Lookout.
- Retrace steps back to the car.
Timeline & Distance
Park car at Round Mountain Lookout on the west side of Olivers Road.
08:34 0.0 km Start walking
09:04 1.65km At telecommunications facility
09:30 2.8 km Leave main foot track (which keeps going towards Mt Vandyke & Mt Roland)
Turn east into a narrow side trail flanked by grassy / low scrub area
09:32 2.85km Start to climb up the rocky slope of Mt Claude
10:07 2.95km Start to climb down into a cavern (When inside, climb up a near-vertical tunnel in a dark cave.)
10:18 3.0 km At the summit of Mt Claude
10:38 3.05km Leave summit
10:54 3.1 km Exit out of the cavern ... same spot as at 10:07
11:08 3.2 km Out of the rocky slope of Mt Claude and onto grassy / low scrub area ... same spot as at 09:32
11:14 3.25km At junction of narrow side trail & main foot track ... same spot as at 09:30
11:22 3.6 km At junction of access trail to Mt Claude Lookout
11:28 3.75km At top of Mt Claude Lookout
11:31 3.75km Leave lookout
11:40 3.95km Back at junction of access trail to Mt Claude Lookout ... same spot as at 11:22
11:56 4.8 km At telecommunications facility
Lunch
12:11 4.9 km Leave At telecommunications facility
12:37 6.55km Back at Round Mountain Lookout
==============================================
Total: 4 hrs 03 mins
6.55 km Distance is from Google Earth
Pictures - Round Mountain Lookout
1) Trailhead is at Round Mountain Lookout, on Olivers Road. Specifically, at the junction of Olivers Road with Mt Claude Lookout Track (or Mt Claude Track ... depending on the maps).
- Red arrow: Bell Mount, 803 meters
- Red oval: Toyota Corolla, a hire car during my stay in Tasmania
- Yellow arrows: Road to Mt Claude ... called Mt Claude Lookout Track or Mt Claude Track

2) At Round Mountain Lookout, facing the direction I'm going.
- Black arrow: Direction of walk ... along Mt Claude Lookout Track towards Mt Claude

Mt Claude Lookout Track to telecommunications facility
3) Boom gate mentioned in the previous pic ... about 175 meters of walking from the carpark.
- Yellow arrow: Direction of walk
- Red arrow: A telecommunications facility is somewhere in that direction. It can't be seen yet.
(I'll pass there on the way to Mt Claude.)

4) Mt Claude Lookout Track to telecommunications facility at top of the hill ~~~
- The Track is actually a road.
- Yellow arrow: Direction of walk

5) Along the road is this panorama.
- Lower pic: (Continuation to the right of the upper pic)
• 2 red arrows from left to right: Mt Roland, telecommunications facility

6) Approaching closer and closer to the telecommunications facility

7) An interesting boulder by the side of the road ~~~
- Yellow arrows: Direction of walk
- Upper & middle pics: Facing forward
- Lower pic: Facing backward

At telecommunications facility
8) At the telecommunications facility
- Lower pic: (Continuation to the right of the upper pic)
• Yellow arrow: Direction of walk

To Mt Claude
9) On the way to Mt Claude
- The road becomes a foot track after the telecommunications facility

10) This white-ish rock lying on the track seems out of place.

11) Mt Claude comes into view
- Upper pic: Zooming into the summit of Mt Claude
• 2 red arrows from left to right:
1 Mt Claude summit ... You can just make out 2 thin sticks at the summit.
2 Chockstone ... one of the ways to reach the summit is to cross the top of this chockstone !
- Lower pic:
• Black rectangle: Enlarged in the upper pic

12) This pic & photo #13 form a 180-degree panorama. (To enlarge the image, click on it.)
I'm standing on the main foot track to Mt Vandyke & Mt Roland, and facing the big rock which is Mt Claude.
- Mt Claude summit can't be seen from here, it is just behind the big rock.
- Cyan arrow: Main foot track to Mt Vandyke & Mt Roland
- Cyan circle: The red triangle marker directs hikers to follow the main foot track.
- Upper yellow arrow pointing to the left: General direction to climb towards Mt Claude summit
- 3 yellow arrows on the left: A narrow foot track leading to where one can climb up Mt Claude
- 3 yellow arrows on the right: An even narrower foot track also leading towards Mt Claude (The 2 foot tracks will soon join up.)

13) (Continuation to the right of previous pic)
Facing backwards ~~~
Yellow arrows: Main foot track I walked on to where I am standing now

On the side track to Mt Claude
14) I've left the main foot track (which goes to Mt Vandyke & Mt Roland); now at a side track that leads us hikers to where one can climb up Mt Claude.
- Yellow arrow: Direction of walk
15) Further along the side track ~~~
- You should be able to match some of the rock features of the previous pic with the ones in this pic.
- Yellow arrows: Route to climb up Mt Claude
- Red arrow: When climbing up, aim towards the red arrow.
- Red dot: Behind this triangle-shaped rock, there is a gap. Climb up the gap.
This same rock is also marked by red dots in the 2 pics in photo #16.

16) Closer to where one needs to scramble up the rocks ~~~
- In the middle of both pics, there is a black hole. They are the same hole.
- Red dots in both pics: They mark the same rock. It is also the same rock as marked by the red dot in previous pic.
- Left pic:
• Red arrow: When climbing up, aim towards the arrow.
- Right pic: A few more steps forward compared to the left pic.
• Yellow arrows: Route to climb up Mt Claude
• Need to scramble over the hole. Not too hard ... If I can do it, so can you :-)

17) A few more steps forward compared to the previous pic ~~~
- Yellow arrows: Route to climb up Mt Claude
- Middle yellow arrow: Need to scramble over the hole. Not too hard ... If I can do it, so can you :-)
- Uppermost yellow arrow: Climb/scramble along the gap there.

Climb up Mt Claude
The lowermost yellow arrow in the previous pic is where you leave the gassy / low scrub area, and start the climb up the rocky slope of Mt Claude.
There are instructions in various websites on the climbing route. I found they are all too wordy and difficult to follow, especially so when not illustrated by photographs.
Not to worry, the route-finding is quite easy. Just keep the following principles in mind:
- Climb more or less straight up, don't veer too much to the left, nor too much to the right.
- If the climb looks easy, take that route. Conversely, if the climb looks hard, don't take that route.
- If the ground looks compacted, it means people have walked on it, then so should you.
- If by chance you are here in the morning of February 22, simply head in the general direction of the sun :-)
There you are, simple !
Some websites also suggest there are cairns you can follow. Forget it; I can't find any until I'm in the cavern in photo #36. By then you don't need any cairn to guide you.
Now, the pictures:
18) Looking up the gap mentioned in the previous pic ~~~
- Large triangle-shaped hole at the bottom: Same as the hole in the middle of previous pic and in photo #16
- Yellow arrows: Haul yourself up the rocks, then ...
- Red arrow: ... then scramble up through the gap ... aim for the red arrow.

19) A few more steps upward compared to the previous pic ~~~
- Yellow arrow: Keep climbing upwards along the arrow.
- Smaller yellow circle: Same as the rock in the yellow oval in photo #20
- Larger yellow circle: Same as the rock pointed by the upper yellow arrow in the previous pic

20) Still scrambling up ~~~
- Yellow oval: Same as the rock in the smaller yellow circle of the previous pic
- Red dot: Same as the rock marked by the red dot in photo #21
- The large rock near the top-right corner is same as the rock labelled as "3" in photo #21.
- Mt Claude summit: Beyond the top-right corner
- Direction of walk: For now, head towards the left side of the large rock near the top right corner.

21) I climb up a nearby higher rock to take this picture.
The scene here is similar to the previous pic ... You should be able to match some of the rocks here with the corresponding ones there. In particular:
- Yellow oval: Same as the rock in the yellow oval of the previous pic
- Red dot: Same as the rock marked by the red dot in the previous pic
- Yellow letters 1 2 3: They mark the same rocks as the corresponding ones in photo #23.
- Mt Claude summit: Beyond the top-right corner
- Direction of walk: For now, towards the left side of the rock marked as "3"

22) Take a breather and look back down the gap from which I scrambled up.
- 3 red arrows, from left to right (south-west-ish):
1 Mt Emmett
2 Barn Bluff
3 Cradle Mountain

23) A few more steps upward compared to photo #21 ~~~
- Yellow letters 1 2 3: They mark the same rocks as the corresponding ones in photo #21.
- Red arrow: Same spot as marked by the red arrow in photo #24's lower pic ... It helps you to compare the 2 pics. But note, the red arrow is not where you should be heading.
- For now, the way forward is to scramble over the rock marked as "1".

24) I have climbed over the rock marked as "1" in the previous pic.
The 2 pics below form a 180-degree panorama.
- Upper pic: Facing backwards
• Red oval: Looking back at the rock marked as "1" in the previous pic
- Lower pic: (Continuation to the right of the upper pic) Facing forward
• Red arrow: Same spot as the red arrow in the photo #23 ... It helps you to compare the 2 pics.
• Yellow arrow: Direction of climb ... And keep going in that direction.
• Red dot: Same as the rock marked by a red dot in photo #25

25) Further forward ~~~
- Yellow arrow: Keeping going along the yellow arrow
- Red dot: Same as the rock marked by a red dot in the previous pic.
- Red oval: Same as the plants in the red oval of photo #27

26) Now facing an area just below the red oval of previous pic ~~~
- Refer to photo #27 for the way forward.

27) A few steps forward compared to previous pic ~~~
- Red oval: Same as the plants in the red oval of photo #25.
- Yellow arrows: The way up

28) Afterwards I come to this scene.
- Yellow arrow: The way forward is through this very narrow gap.
- Note: The entrance into the gap is blocked by a tree trunk.
- So, either squeeze through between the tree trunk and the rock on the right;
- or if you are a big guy, climb over the rock on the right.
29) This scene comes up almost immediately after passing through the gap of previous pic.
- Yellow oval: Under the overhang of the big rock is a cavern.
Climb down into the cavern, then climb up a near-vertical tunnel is one way to reach the summit.
- Yellow arrows: Turning left is a path to a chockstone ... refer to photos #30 and #31. This is another way to the summit.

Chockstone
30) This is the path to the chockstone; the same path along the yellow arrows in the previous pic.
- I don't intend to walk over the chockstone to the summit, but no harm going there to take a look :-)

31) This is it, the chockstone. Also refer to photo #32.

32) The chockstone and the summit of Mt Claude (the 2 red arrows)
- One can walk over the chockstone to the summit. It is not hard, but you will feel exposed, and so not for the faint hearted :-)

Cavern
As I don't intend to walk over the chockstone, I backtrack down to where photo #29 was taken; then walk to the yellow oval there.
There is a cavern under the big rock in the yellow oval.
33) Looking down at the entrance into the cavern ... Don't worry, it is not hard to climb down :-)

Once inside the cavern, head towards the chokstone. (Look for the sky and head towards it.)
34) This is it, the chokstone.
- Yellow oval: There is a gap. To climb to the summit, turn right into this gap.

35) At where I was when taking the previous pic, and facing backwards ~~~
- Looking back at where I descended from the opening into this cavern.

36) After turning right into the gap in the yellow oval in photo #34 ~~~
- Upper pic:
• Red circles: Cairns ... I haven't seen any cairn until now.
- Lower pic: Further into the gap
• Red circle: Same cairn as the red circle on the right of the upper pic
• Yellow oval: Entrance to a dark cave ... The cairn (red circle) marks the entry point.

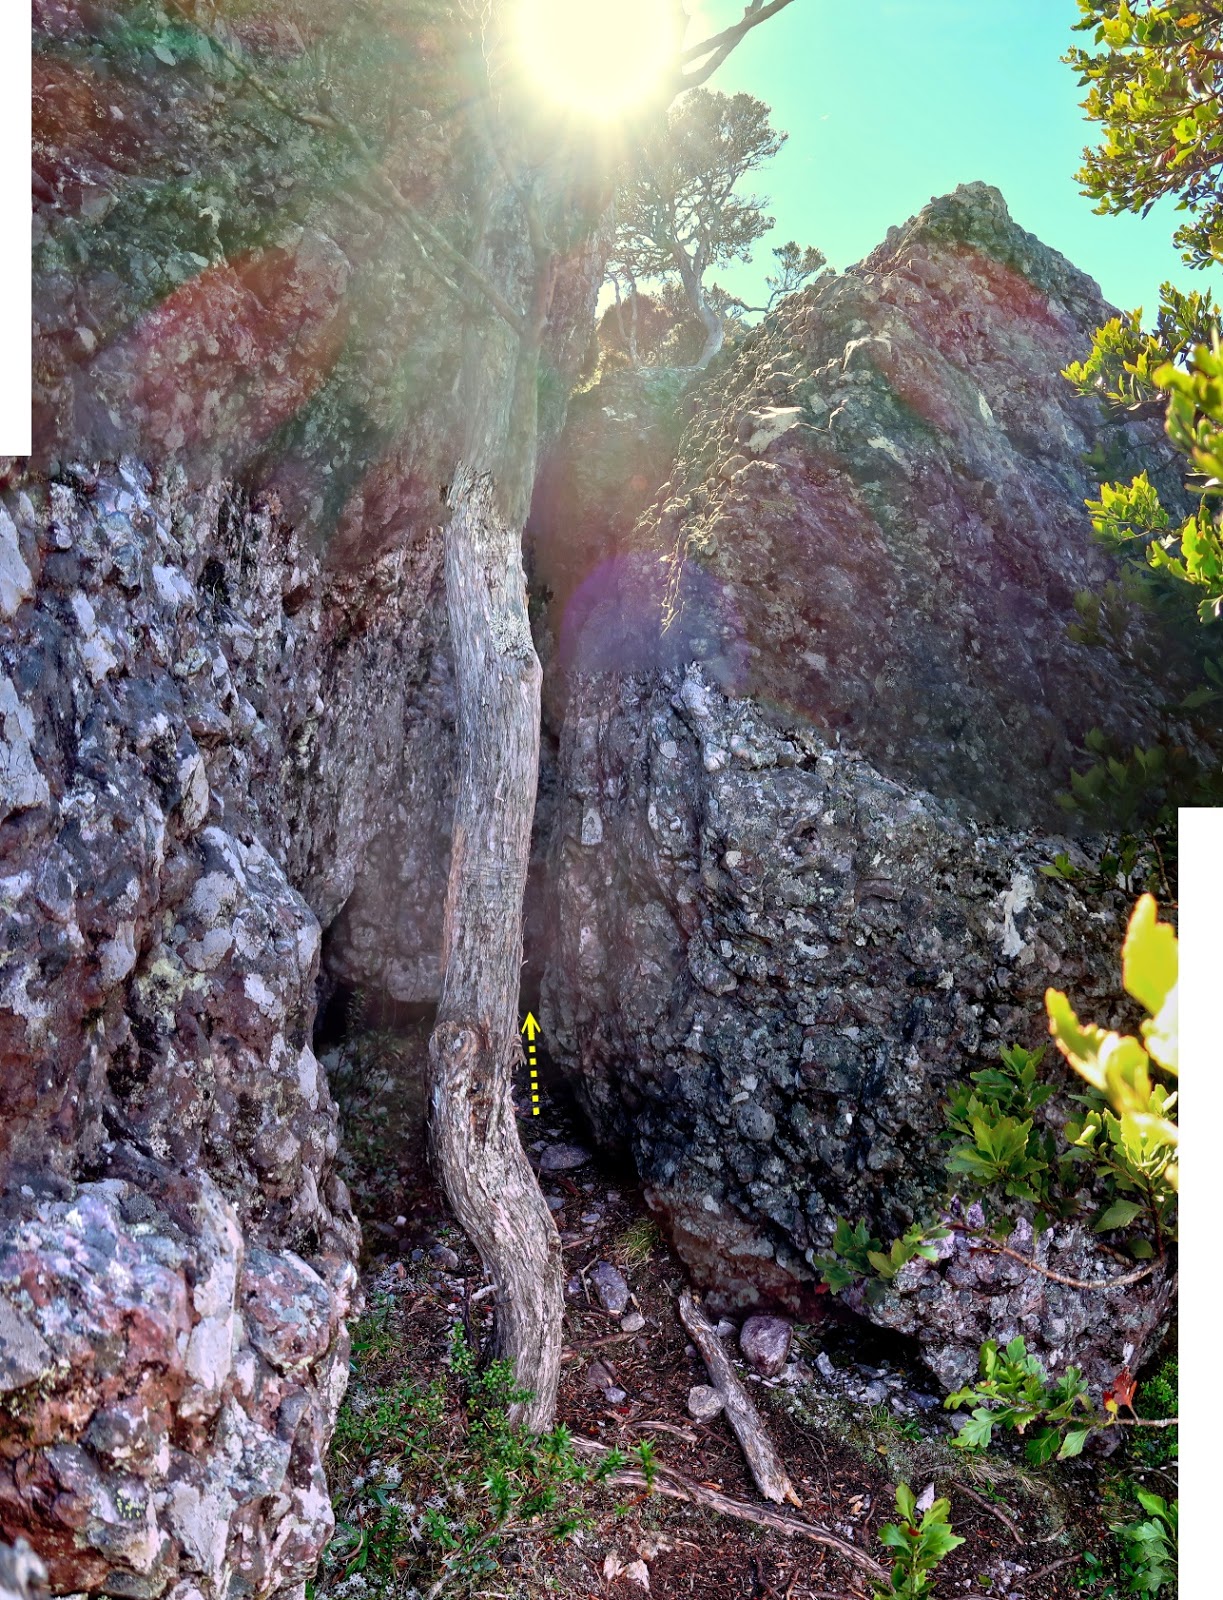
Dark cave
37) Facing the entrance into the dark cave (after turning left at the yellow oval of the previous pic).

Near-vertical tunnel in the dark cave
Further into the cave, there is a near-vertical tunnel leading all the way to the top of Mt Claude.
I left my backpack outside the cave, and with it the torch. There is a bit of light from the opening at the top of the tunnel, otherwise it is dark inside.
There is a long rope, anchored from far above. You can grab onto the rope for the climb. But without a torch, I didn't see it :-) And so, I bare-handedly climbed up for quite a distance. By the time I notice the rope, the difficult part of the climb is over. I grab the rope anyway, but I could have climbed all the way up without using it :-)
But I should have taken the torch into the cave to make life easier.
As the cave is dark, the rocks are always damp inside. If it had rained a few days ago, I reckon some water could be running over the surface of the rocks to make them slippery. And so, a rope would be necessary to assist the climb.
Further, without a rope, descending would be dangerous even in the dry, because it is difficult to find footholds while climbing down in a dark cave.
38) This is the near-vertical tunnel in the dark cave ... I am looking directly up.
- White arrows: A dirty blue rope
- Yellow dot: As I didn't take a torch into the cave, I didn't notice the rope until I reach this point. By then, the difficult part of the climb is over :-)

39) Close to the top entrance of the tunnel ... and looking directly up

Mt Claude summit - 1034 meters
40) Once out of the tunnel, just a few more meters to the summit at the red arrow

41) At Mt Claude summit, 1034 meters ~~~
- Upper pic: 3 red arrows from left to right:
1 Mt Emmett
2 Barn Bluff
3 Cradle Mountain
- Lower pic: Me !

42) The small town Gowrie Park can be seen clearly from the summit.
- Red arrows: Claude Road, C136

43) Panorama from Mt Claude summit ~~~
- White rectangle: The small town Gowrie Park ... It is enlarged in the previous pic.
- Red arrow: Mt Roland
- Red dot: The town of Sheffield
- This pic and the 3 pics in photo #44 form a 360-degree panorama.

44) Panorama from Mt Claude summit ~~~
- Upper pic: (Continuation to the right of previous pic)
• 2 red arrows from left to right:
1 Mt Vandyke
2 Unnamed rocky hill
• Right half of the pic: On the horizon is Central Plateau and Walls of Jerusalem areas.
- Middle Pic: (Continuation to the right of the upper pic)
• 3 red arrows from left to right:
1 Mt Emmett
2 Barn Bluff
3 Cradle Mountain
• To the left of Mt Emmett should be Mt Pelion West, Mt Ossa, Mt Pelion East ... too cloudy to be seen today.
- Lower pic: (Continuation to the right of the middle pic)
• 2 red arrows from left to right:
1 Mt Claude Lookout ... I'll go there next.
2 Black Bluff
• The left side of this pic is enlarged in photo #45.
- Continuation to the right of the lower pic is photo #43, thus completing a 360-degree panorama.

45) A closer look at Mt Claude Lookout ... I'll go there next.
- 5 red arrows from left to right:
1 Cradle Mountain
2 Mt Claude Lookout
3 Black Bluff
4 Mount Jacob
5 Bell Mount

Climb down Mt Claude summit
Mission accomplished ... Time to leave the summit :-)
46) Entrance hole to get down the tunnel ~~~
- Yellow arrow: When I climbed out of the tunnel earlier on, this was the direction to the summit.

47) Just inside the entrance hole of previous pic, and looking directly down ~~~
- There is a near-vertical drop down to the dark band area.
- You can see the blue-ish rope. Without it, it would be dangerous to climb down.
- You can also just make out my cyan-coloured backpack outside the entrance.

48) Close to the entrance ~~~
- I have climbed down the rope. My cyan-coloured backpack is just outside the entrance.

To Mt Claude Lookout
49) While returning to the car, detour to visit Mt Claude Lookout ... This is the lookout with its antenna at the top.

50) To Mt Claude Lookout, take an access track that branches northward off the main foot track.

51) The access track to Mt Claude Lookout (red arrow)

52) Mt Claude Lookout

53) Almost at the top of Mt Claude Lookout

At the top of Mt Claude Lookout - 1010 meters
54) At the top of the lookout, 1010 meters approx

360-degree panorama from the top of Mt Claude Lookout
Photos #55 to #59 form a 360-degree panorama from the top of Mt Claude Lookout.
55) A nice view of Mt Roland & Mt Claude ~~~
- Red dot: The town of Sheffield
- 3 red arrows from left to right:
1 Mt Roland
2 Mt Vandyke
3 Mt Claude ... A close up view of Mt Claude is photo #56.

56) (Continuation to the right of previous pic)
Mt Claude ~~~
- Middle & lower pics: The 2 red arrows point to Mt Claude summit and its chockstone.
57) (Continuation to the right of photo #56)
Towards south-east and south ... ie towards Central Plateau and Walls of Jerusalem

58) (Continuation to the right of previous pic)
- 5 red arrows from left to right:
1 Mt Emmett ... south-west
2 Cradle Mountain (Between Mt Emmett & Cradle Mountain is Barn Bluff, obscured by clouds)
3 Black Bluff
4 Mount Jacob
5 Bell Mount ... west-north-west-ish
- White oval: Top of the lookout ... Another view of the solar panels and the electronic stuffs are in photo #54.

59) (Continuation to the right of previous pic)
Scenery from west-north-west-ish to north-east-ish ... to enlarge the image, click on it.
- Red arrows: Bell Mount ... west-north-west-ish
- Red dot: The town of Sheffield ... north-east-ish
- Continuation to the right of this pic is photo #55, thus completing a 360-degree panorama.

Return to telecommunications facility
60) I've climbed down Mt Claude Lookout, now on the main foot track back to the telecommunications facility.
- 2 red arrows from left to right: Mt Emmett and Cradle Mountain
- Barn Bluff should be between Mt Emmett and Cradle Mountain. But it is too cloudy on the horizon to be seen now.

61) There are a few large Banksia trees lining the foot track.
- Is this Banksia marginata?
- What about the one in the white oval and the lower pic ... also a Banksia ?

62) Close to the telecommunications facility

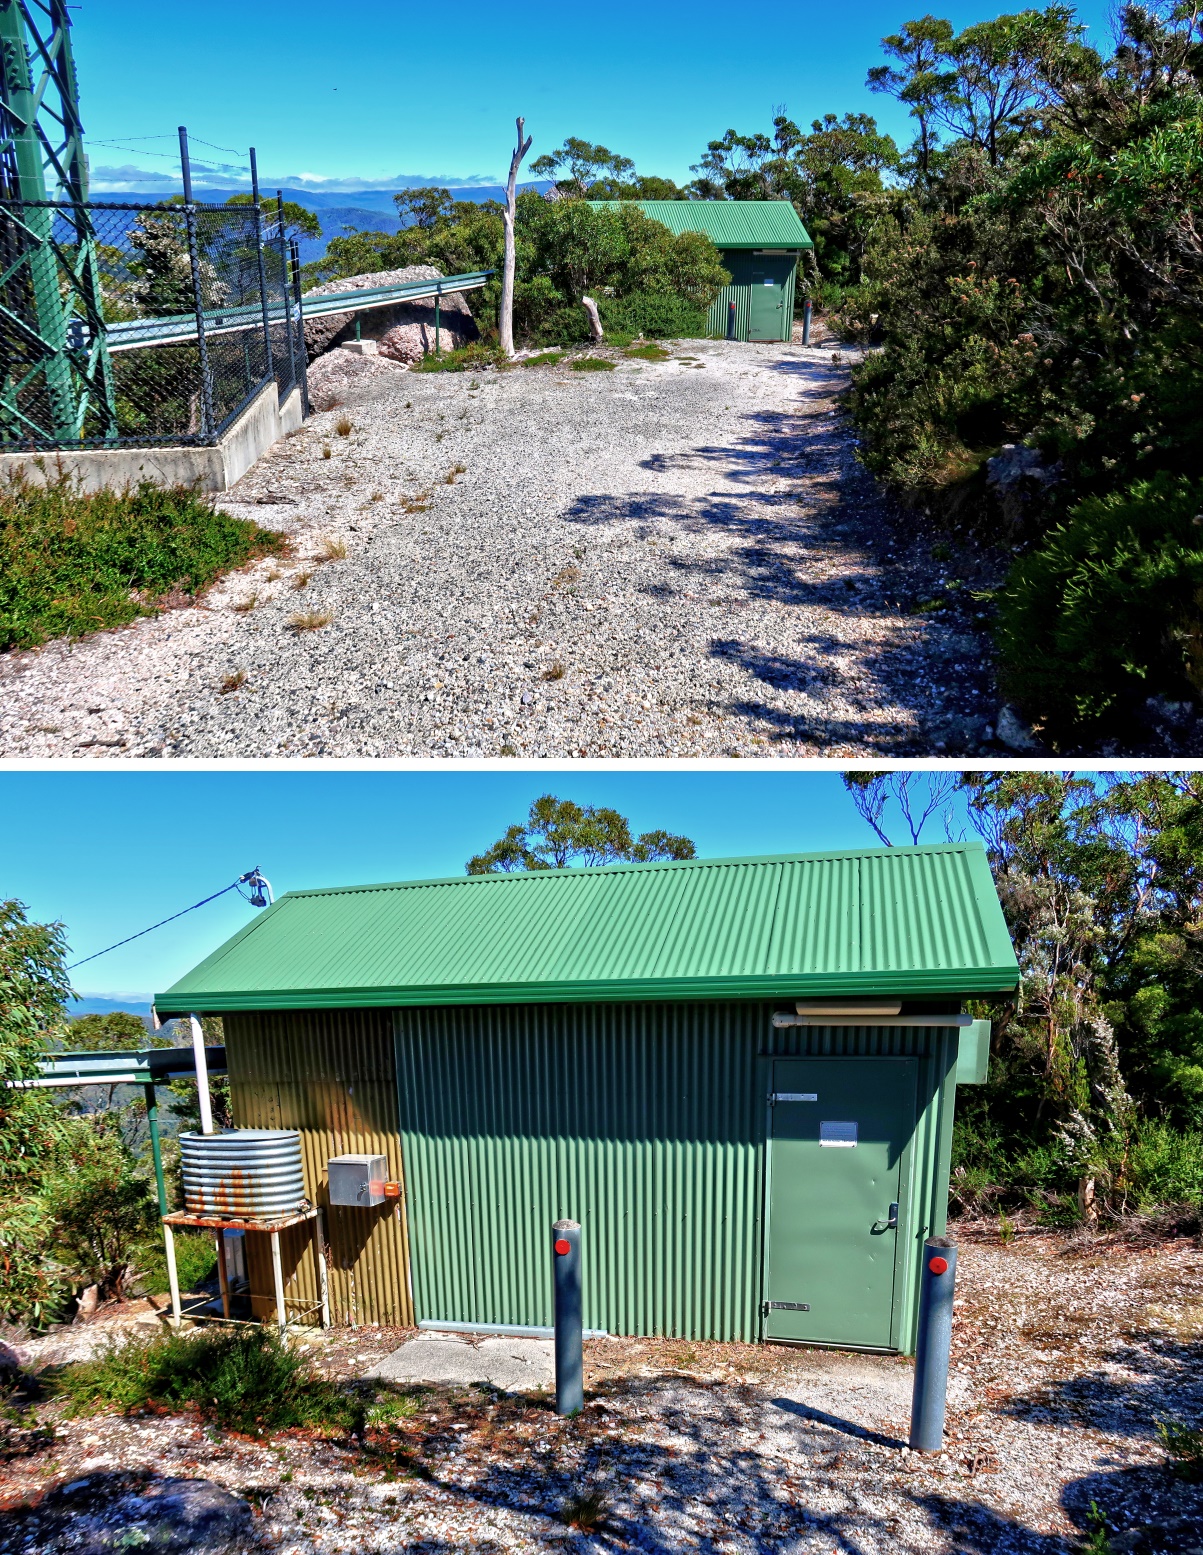
At telecommunications facility
Pictures of the telecommunications towers are in photo #8.
63) The front of a workman's shed at the telecommunications facility ~~~
The door is locked. I'll lunch at the back in the shade.
Return to car
64) On the way back to the car ~~~
- 3 red arrows from left to right:
1 Black Bluff
2 Mt Jacob
3 Bell Mount

65) Plenty of Leptospermum (Tea Tree) lining the road

Back at Round Mountain Lookout
66) Back at Round Mountain Lookout ~~~
- Red arrow: Toyota Corolla, a hire car during my stay in Tasmania
- The other people are tourists.

67) Scenery from the lookout ~~~
- Upper pic:
• 5 red arrows from left to right:
1 630-meter hill west-south-west of the lookout
2 Black Bluff
3 Mt Jacob
4 Bell Mount
5 610-meter hill north-west of the lookout
- Lower Pic: (Continuation to the right of the upper pic)

Comment
Mt Claude may not be a high mountain, but it is pretty unique due to its chockstone and the tunnel ... a must climb for all Aussie peak baggers :-)
On the traverse of Mt Roland plateau ... to Mt Roland, Mt Vandyke and Mt Claude, refer to my trip report in:
http://mntviews.blogspot.com.au/2017/01/mt-roland-mt-vandyke-mt-claude-lookout.html
No comments:
Post a Comment